
2025-3-2 11:38:23
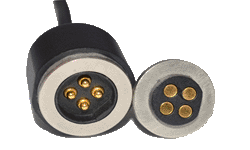
When replacing a new Pogo Pin, you need to follow certain steps and precautions to ensure that the replacement process is smooth and does not cause damage to the device. Here is a detailed replacement guide:

1. Preparation
1. Confirm the model and specification:
• Before replacement, ensure that the model and specifications of the new Pogo Pin are the same as those of the old one to ensure compatibility and performance.
2. Prepare tools:
• According to the actual situation, prepare the necessary tools, such as screwdrivers, tweezers, welding tables, tin absorbers, etc.
3. Turn off the power and disconnect:
• Before replacement, be sure to power off the device and disconnect all circuits or devices connected to the Pogo Pin to avoid the risk of electric shock or short circuit.
2. Remove the old Pogo Pin
1. Remove fasteners:
• Use a tool such as a screwdriver to remove screws, clasps, or other fasteners that hold the Pogo Pin in place.
2. Disconnect the electrical connection:
• If the Pogo Pin is secured to the board by soldering, carefully melt the solder joint and disconnect the electrical connection using a soldering stand and a tin absorbent.
3. Take out the old Pogo Pin:
Using tweezers or other tools, carefully remove the old Pogo Pin from its fixed position to avoid damaging the surrounding circuit board or components.
3. Install new Pogo Pin
1. Positioning and fixing:
• Place the new Pogo Pin in the correct position and secure it with screws, clasps, or other fasteners. Ensure that it is firmly fixed to avoid loosening during use.
2. Establish electrical connection:
• If the new Pogo Pin needs to be secured to the board by soldering, solder it in the correct position using a soldering table and solder. When welding, pay attention to control the amount and temperature of solder to avoid damage to the circuit board or Pogo Pin.
3. Check the connection:
• After installation, carefully check the electrical connection and fixing of the new Pogo Pin to ensure that it is correct.
4. Testing and verification
1. Functional test:
Reconnect the device power supply and test that the new Pogo Pin is functioning properly. You can check the connection stability of the device, signal transmission quality and other indicators.
2. Stability verification:
• Observe the stability of the new Pogo Pin within a certain period of time to ensure that it does not appear loose, poor contact and other problems during use.
5. Precautions
1. Anti-static treatment:
• During the replacement, take ESD measures to prevent static electricity from damaging the circuit board or Pogo Pin.
2. Gentle operation:
• During removal and installation, be gentle to avoid physical damage to the circuit board or Pogo Pin.
3. Professional guidance:
• If you are unfamiliar with the replacement process or encounter difficulties, it is recommended to seek professional guidance or help.
By following the above steps and precautions, you can smoothly replace the new Pogo Pin and ensure the normal operation of the device.
